
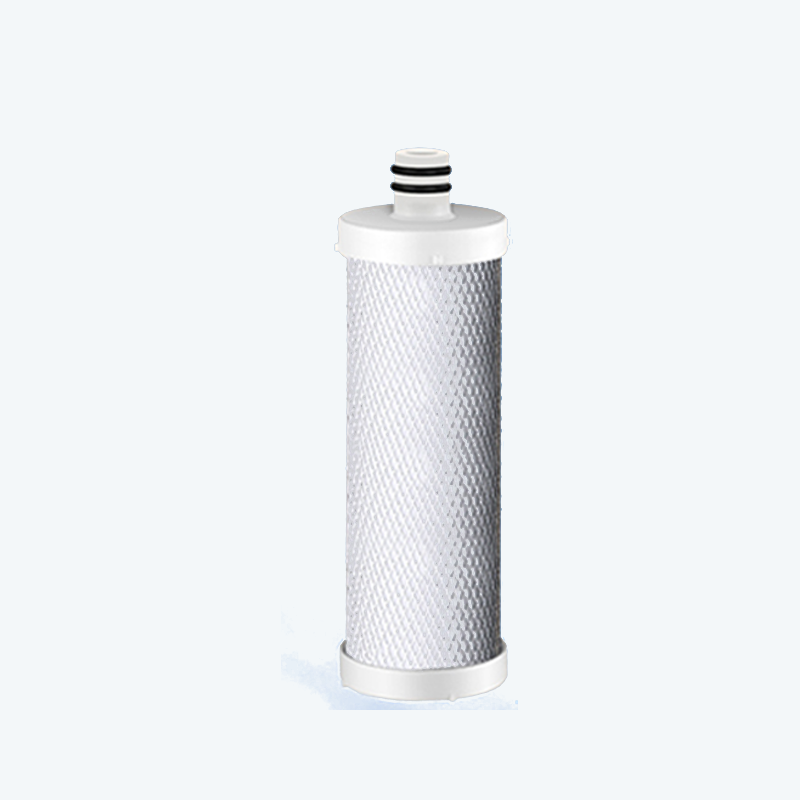
VORTOPT Q8/Q9 CTO Replacement Filter Cartridge

$30.99
Replacement CTO cartridge for current VORTOPT Q8 and Q9 systems only. Match SKU VOR-Q8-Q9-FILTER, verify the live package quantity, then follow the manual-supported quarter-turn installation, five-minute flush and leak check. Service timing depends on water quality and use.
1000 in stock
The VORTOPT Q8/Q9 replacement filter, SKU VOR-Q8-Q9-FILTER, is the white CTO cartridge confirmed for current VORTOPT Q8 and Q9 systems only. It is not a universal cartridge. Before ordering, match the system nameplate, the old cartridge and the current package quantity. During replacement, shut off the cold-water supply, turn the used cartridge counterclockwise about one quarter-turn, remove the new cartridge’s protective cap, install it clockwise, align the mark, restore water slowly, flush for five minutes and check for leaks.
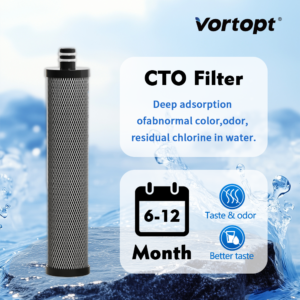
The Q8 and Q9 manuals use CTO as the filter-element identity; that wording does not by itself prove NSF/ANSI certification or a particular contaminant-reduction percentage. The manuals cite 6–12 months only as a service reference affected by local water quality and use. Product artwork, a similar white shell or an old listing must not replace an exact model and SKU check.
Match the exact Q8 or Q9 system
This replacement cartridge has a deliberately narrow compatibility statement. It is confirmed for the current VORTOPT Q8 quick-connect under-sink system and the current VORTOPT Q9 direct-connect under-sink system. Those two systems use different installation layouts, but their completed product records point to this same replacement SKU. That relationship does not extend to Q1, Q6, Q700, Q800 or another cartridge simply because the housing color, connector or CTO label looks similar.
Read the model printed on the system nameplate, not a remembered product family name. Then compare the old cartridge’s connector, O-rings, shoulder shape and label with the current product photograph. If the nameplate is missing or the installed cartridge does not match, stop and send clear photographs of the system, old cartridge and connection area through the VORTOPT contact page. Forcing an approximate match can damage the filter head or create a leak inside the cabinet.
Check SKU, label and current package quantity
Use VOR-Q8-Q9-FILTER as the ordering key. Confirm that SKU on this listing, your order confirmation and the received item before removing the used cartridge. Keep the old cartridge available until the new one has been visually compared. The current product record identifies a replacement cartridge, but the source artwork shows different combinations of cartridges and whole systems. Those arrangements are presentation graphics, not proof that every order contains two cartridges, a faucet, a filter head or installation fittings.
Package quantity should therefore be read from the live quantity selector, order line and shipment contents rather than inferred from an image. If the received label, quantity or connector differs from the order record, leave the protective cap in place and contact support before installation. Do not treat the source archive’s packaging dimensions as guaranteed cartridge dimensions; packaging and product measurements are different objects.
Understand the CTO source identity
The Q8 and Q9 manuals identify the replaceable element as a CTO filter element. On this page, CTO is used only to preserve that model-document identity and help owners select the correct service part. It is not presented as independent laboratory evidence, a certification mark or a promise that the cartridge reduces every substance associated with activated-carbon advertising.
No current certificate supplied for this exact SKU establishes NSF/ANSI 42, NSF/ANSI 53 or another standard. For the same reason, this page does not repeat artwork claims about 99.12% reduction, heavy metals, viruses, antibiotics, health outcomes or guaranteed taste improvement. Customers who need treatment for a known contaminant should rely on a current, model-specific performance data sheet covering that contaminant and the exact operating conditions—not on the words CTO, carbon or replacement filter alone.
Separate cartridge facts from system specifications
Flow rate, rated capacity, inlet pressure, faucet connection, tubing size and whole-system dimensions belong to the Q8 or Q9 system record. They are not cartridge specifications and should not be copied onto this replacement page. Likewise, an image that places a cartridge beside a full system may show scale or installation context without proving what is included in the cartridge order.
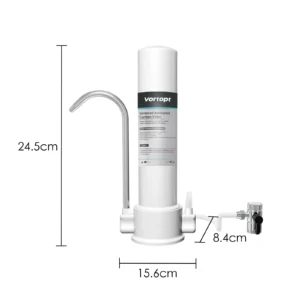
The source set includes a dimension graphic, but it mixes a cartridge, whole system, connectors and labels. The product master also contains a 73 × 73 × 192 mm packaging record and an obviously questionable weight entry of 0.153g. Neither is published here as a guaranteed physical specification. Measure cabinet clearance around the installed head, compare the actual old and new cartridges, and use the current Q8 or Q9 manual for system-level limits.
Prepare the cabinet before replacement
- Verify Q8 or Q9, SKU VOR-Q8-Q9-FILTER and the current package quantity.
- Use cold water only and close the cold-water supply valve completely.
- Clear the cabinet, protect the floor and place a towel or shallow tray beneath the filter.
- Make sure the shutoff valve and filter head remain visible and reachable.
- Keep the protective cap on the new cartridge until you are ready to install it.
Do not begin if the valve will not close, the filter head is loose, tubing is sharply kinked or water is already present around a fitting. Correct those conditions first. Avoid freezing conditions and do not use the cartridge on water that is microbiologically unsafe or of unknown quality without adequate disinfection before or after the system, as directed by the source manuals.
Remove the used cartridge with the quarter-turn sequence
With the cold-water supply closed, support the filter head with one hand and grip the cartridge body with the other. Turn the used cartridge counterclockwise—toward the left—about one quarter-turn, following the Q8/Q9 manual sequence. Pull it down in a controlled vertical motion. A small amount of retained water can drain, which is why the cabinet should be protected before removal.
Do not twist the connected tubing, use a wrench on the cartridge body or pull sideways against the head. If the cartridge does not release with the documented motion, recheck the direction and confirm that water is shut off. Excess force can damage the mount or seals. Keep the used unit nearby for a final connector and label comparison.
Install and align the new cartridge
Remove the protective cap from the new cartridge only after the old one is out. Inspect the top connector and black O-rings for visible cuts, twisting, debris or displacement. Do not add tape, lubricant or an extra seal unless the current product instructions expressly require it. Insert the cartridge straight into the head, keeping the connector aligned rather than approaching at an angle.
Turn the cartridge clockwise—toward the right—about one quarter-turn until it reaches the installed position. Align the triangle or installation mark shown in the current manual. The correct result is secure and aligned, not overtightened. Recheck that tubing has not been pulled, compressed or kinked during the change.
Restore water, flush and leak-check
Open the cold-water supply slowly while watching the cartridge-to-head joint and every disturbed connection. If water appears, close the valve immediately, relieve pressure at the faucet and reinstall only after checking alignment and seals. Never leave the cabinet unattended during the first return to pressure.
The Q8 and Q9 manuals direct users to flush the new filter for five minutes. Initial dark or black water can be carbon powder released during flushing; the manual describes that as normal during the initial flush. Continue the full five-minute flush and observe whether the water clears. After flushing, close the faucet and inspect again under static pressure, then repeat the check after several minutes. Persistent black water, unusual odor, poor flow or any leak is a stop-and-investigate condition, not something to conceal with a longer service claim.
Use condition-based service timing
The source manuals cite 6–12 months as a reference range and explicitly state that service life depends on water quality. This is not a guaranteed one-year lifespan. Sediment load, disinfectant level, household use, periods of non-use and local water conditions can all change the practical replacement interval. A calendar reminder is useful, but it should be paired with observed performance and the latest model instructions.
Record the installation date and keep the SKU with your maintenance notes. Review the filter when flow changes materially, taste or odor changes unexpectedly, the system has been exposed to freezing, or local water conditions change. A cartridge cannot make microbiologically unsafe or unknown water safe without adequate disinfection, and a normal-looking cartridge does not verify contaminant reduction.
Complete the Q8/Q9 replacement checklist
Confirm Q8 or Q9, SKU, old-cartridge shape, live quantity, shipping and return terms.
Close cold water, protect the cabinet, keep the valve accessible and inspect existing connections.
Remove the cap, inspect O-rings, insert straight, turn clockwise and align the mark.
Restore water slowly, flush five minutes, check under flow and static pressure, and record the date.
Before payment, review the current shipping policy, returns and refunds policy and warranty and support information. Consumable-filter coverage should not be assumed from whole-system warranty language. You can browse replacement filters, compare the broader under-sink filter category, or return to the VORTOPT shop, but only an exact Q8/Q9 and SKU match should determine this purchase.
VORTOPT Q8/Q9 replacement filter FAQ
Which systems are confirmed for this cartridge?
The confirmed compatibility is limited to the current VORTOPT Q8 and Q9 systems. Verify the system nameplate and SKU VOR-Q8-Q9-FILTER before ordering.
Does it fit another VORTOPT model or a similar filter head?
Not on the evidence available. Similar appearance, CTO wording or approximate dimensions do not establish connector, seal or locking compatibility.
What does the CTO label prove?
It identifies the element in the Q8/Q9 source manuals. It does not independently prove certification, a contaminant list, a reduction percentage or a health outcome.
Does the order include two cartridges?
Do not infer quantity from source artwork. Confirm the live order quantity and order line. Contact VORTOPT before installation if received quantity differs.
Is 6–12 months or one year guaranteed?
No. The manuals present 6–12 months as a reference affected by water quality. Actual timing depends on conditions and the latest model guidance.
Is NSF/ANSI 42 or 53 certification verified for this SKU?
No current certificate supplied for VOR-Q8-Q9-FILTER establishes either claim. This page therefore does not advertise those certifications.
What is the correct replacement and flush sequence?
Close cold water, turn the used cartridge left about one quarter-turn, remove the new cap, insert straight, turn right, align the mark, restore water slowly, flush five minutes and leak-check.
What should I do if it leaks or black water continues?
Close the supply immediately for a leak and recheck fit, alignment and seals. Initial carbon powder may occur during the five-minute flush, but persistent discoloration or any leak requires investigation and support.
Verified compliance evidence
NSF/ANSI 42 component listing
NSF’s official listing names Vortopt FILTER CARTRIDGE as an NSF/ANSI 42 carbon-block component certified for material requirements only. This separate component evidence does not certify this complete retail item or system and does not establish a model-specific contaminant-reduction claim.
Be the first to review “VORTOPT Q8/Q9 CTO Replacement Filter Cartridge”
Related products

Replacement Filters

Replacement Filters

Replacement Filters

Replacement Filters
Replacement Filters

Replacement Filters

Replacement Filters
VORTOPT VT-CTF-F Replacement Filter for F7 Countertop System

Replacement Filters
Reviews
There are no reviews yet.